Tuesday, January 28, 2014

Homemade Natural Lip Gloss

From Ourbestbites.com

For the base of your lip gloss, you’re going to need coconut oil, beeswax, and Vitamin E (I just got the capsules).


Coconut oil. There are LOTS of different coconut oils on the markets these days, so take your pick. I tried out every brand I could find and from my (somewhat limited) research, this brand (Nutiva Extra Virgin Coconut Oil) was the only one that had a coconut scent/flavor. Even some of the other organic coconut oils were essentially scentless and flavorless. Now, which kind you use is definitely personal preference–you might want that coconut flavor in your lip gloss if you’re making strawberry coconut, but you might not want it if you’re making cherry cola (guess who grew up on Lip Smackers and had lots of fun playing with different flavors?).
Beeswax. You can get it at craft stores like Hobby Lobby or Michael’s, but it’s generally sold in chunks, which will need to be grated. You can also get pellets like these ones which will make your life easier.
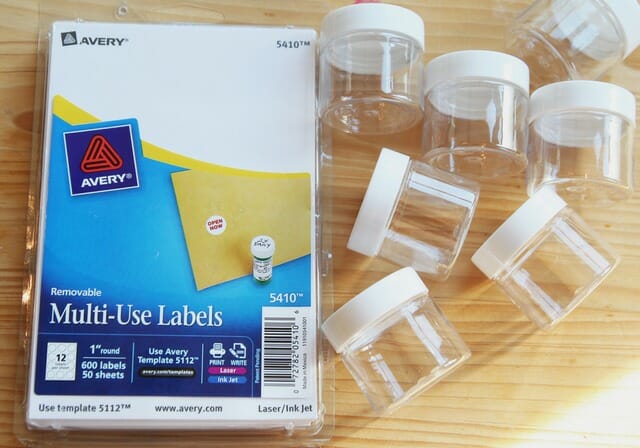
You’ll also need some kind of container and, if you want, labels. I used 1″ round Avery labels andthese 1-ounce plastic jars

but this site has a ton of fun lip balm containers and they’re not sold in lots of 10 million, which is always a bonus for those of us who don’t need 10 million empty lip balm containers. I wouldn’t recommend going any larger than 1 ounce–that’s a lot of lip gloss.
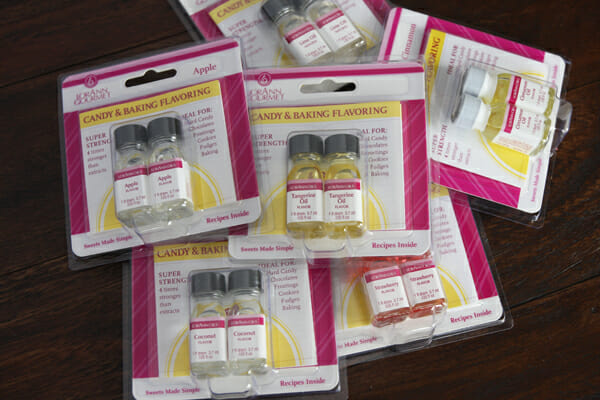
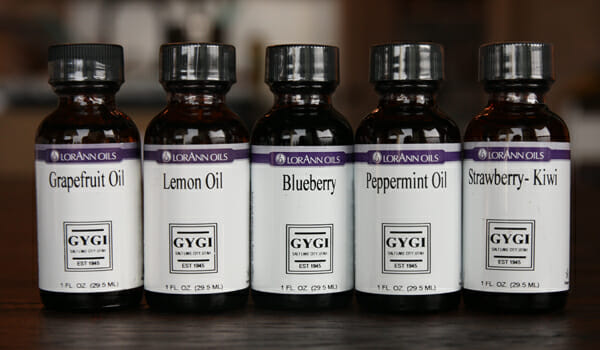
You’ll also need something to flavor your lip gloss with. I used candy flavor oils like these ones:


One of the funnest things was playing around with different flavors. I made coconut-lime because (shocker) that is my all-time favorite (and because when the late January doldrums set in, that’s my go-to smell to get me out of them) and grapefruit. Not with the coconut-lime, just by itself. Fun Kate fact: I hate grapefruit and grapefruit juice, but I love all things grapefruit-flavored. But seriously, the sky’s the limit when it comes to combinations.
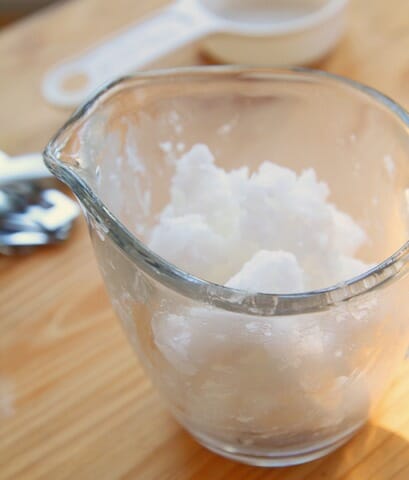
Place the coconut oil in a 1-cup glass measuring cup (you can get one for, like, $2 at Target or Walmart that you use only for lip gloss making)

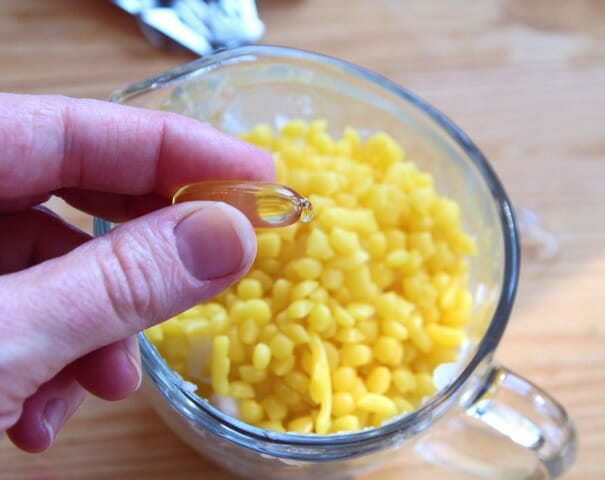
and then add the beeswax


and prick a Vitamin E capsule with a push pin and squeeze the oil into the measuring cup.


Heat the measuring cup for 30 seconds at a time, stirring well after each heating (I just used a plastic straw so I could throw it away when I was done) until everything is completely melted (in my microwave, it took about 90 seconds-2 minutes). Now…if you want to make a couple of different flavors from this batch, you could pour some of it into another couple of spouted heat-safe cups and add the oils separately, or you could just flavor the whole batch. For me and my oils and flavors, I ended up needing about 40 drops of grapefruit oil and 17 drops of coconut along with 8 drops of lime flavor. Keep the following things in mind:
  • Some flavors are stronger than others–you might need to adjust how much oil you end up using.
  • Flavors like vanilla, coconut, etc. are going to be milder than flavors like citrus, cinnamon, and mint, so keep things balanced.
  • Dab a little of the liquid mixture onto your lips, but keep in mind that the flavors will get stronger after the lip gloss solidifies.
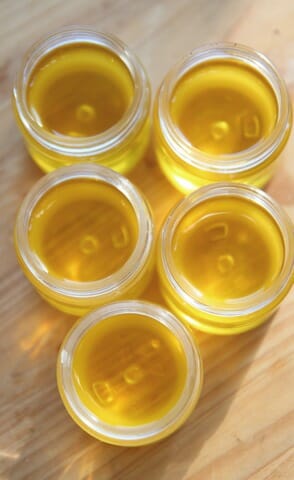
After you’ve mixed your flavors, pour them into your empty containers

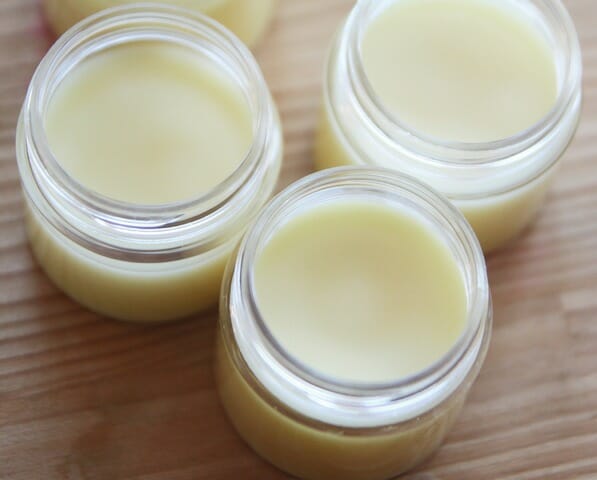
and let them cool to solidify (about 15-20 minutes).


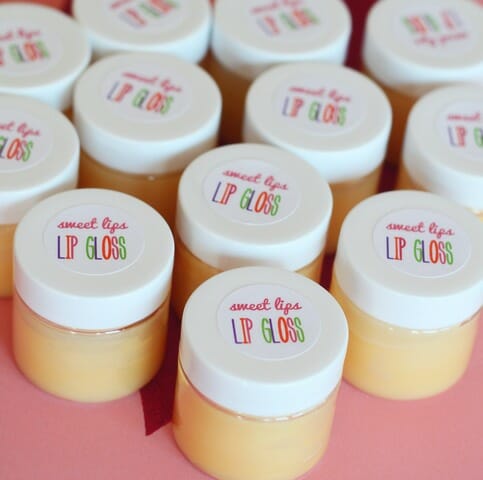
I made these labels to go on top:


Homemade Natural Lip GlossBy Our Best Bites
Ingredients:
3/4 cup + 1 tablespoon coconut oil*
3 tablespoons grated beeswax or beeswax pellets*
1 1000 I.U. capsule of Vitamin E
25 drops of flavor oils or 40 drops of essential oils (add more or less if necessary)
*If making this lip gloss in tubes, use 3/4 cup coconut oil and 1/4 cup beeswax.
You’ll also need…
Dropper (like this)
1-ounce or smaller jars, tubes, or tins
Labels (optional)
Washi tape (optional)
Instructions:
In a microwave-safe glass container with a spout, combine the coconut oil and beeswax. Heat on high for 30 seconds at a time, stirring after each heating, until the beeswax completely  melts. You can either flavor all the lip gloss one flavor or pour the mixture into a few smaller containers and mix up smaller batches of different flavors. After you’ve added the desired flavors, pour the mixture into jars, tubes, or tins and allow to cool completely. Decorate as desired.

Flame Retardant Soda Is Safe To Drink According To FDA

By Paul A. Lauto, Esq.\

by Long Island Attorney Paul A. Lauto, Esq./www.liattorney.com
Many of us have heard of flame retardant pajamas for children, but far less have heard of flame retardant soda.  We wouldn’t eat flame retardant pajamas, so why does the FDA say it’s safe to drink soda containing flame retardant?
There are a multitude of health preserving reasons not to drink soda and other assorted soft drinks, but one reason in particular is Brominated Vegetable Oil (BVO).  BVO is a vegetable oil derived from corn or soy and is used in citrus flavored sodas and soft drinks, as an emulsifier to help the flavoring from separating.  Brominated Vegetable Oil sounds harmless, yet the FDA limits its use to 15 parts per million to ensure that it is safe for our consumption.  Notwithstanding the FDA’s approval of BVO, it is banned in soft drinks in Europe and Japan, as they believe it is unsafe for human consumption.
BVO was originally patented for use as a flame retardant, but the FDA has deemed it safe to be used in soda since 1970.  BVO is considered toxic by many including the FDA, which is why they have limits on its usage.  In addition, BVO has been associated with serious ailments including but not limited to, neurological impairment, hormone disruption, thyroid dysfunction, infertility, memory loss and heart lesions.
It is estimated that BVO is contained in approximately 10% of soft drinks consumed by Americans.  If you agree with the FDA and believe it is safe for  your family to drink soda containing a flame retardant with potentially grave side effects to your health, then that is certainly your right.  However, if you do not believe the FDA is infallible and free of outside influence, then stand up for your families and stop drinking soda that contains BVO.  Better yet, stop  buying and drinking soda altogether.  Some day when your children are old enough to fully understand, they just might thank you.

Coconut flour: A nutritious, gluten-free substitute to processed flour

by: Michael Ravensthorpe

(NaturalNews) Coconut flour is a flour made from coconut solids that have been ground into a very fine powder. It has a mild coconut scent and flavor, which makes it suitable for flour-based recipes that don't have other strongly-flavored ingredients such as cocoa powder or spices. It is also quite light and airy, making it especially suitable for baked goods like muffins, pancakes and cakes.

The reputation of coconut flour is growing in the West due to its considerable health benefits, which far exceed those of processed flours. Below is a list of reasons why health-conscious individuals are beginning to take coconut flour seriously, and why an increasing number of books specializing in coconut flour recipes are being published every year.

Gluten-free

Arguably coconut flour's biggest attraction is its gluten-free status, meaning it contains none of the gluten protein molecules found in grains such as wheat, rye and barley. Gluten is highly allergenic and can even be deadly for people with Celiac disease (a condition where gluten damages the lining of the small intestine and prevents it from absorbing nutrients in food). However, growing evidence - particularly that compiled by Dr. William Davis in his 2011 book, Wheat Belly - suggests that gluten is unhealthy for everyone, and is a leading cause of lethargy, bloating, brain fog and more. Fortunately, gluten-free diets are becoming much easier to adopt thanks to the growing availability of gluten-free flours like coconut flour.

Rich in dietary fiber

According to a study published in the December 2006 issue of Innovative Food Science & Emerging Technologies, adding coconut flour to our diets can significantly reduce our risk of developing heart disease, lower our cholesterol levels and guard us from cancer and diabetes. The researchers, based in the Food and Nutrition Research Institute in the Philippines, claim that these benefits stem from coconut flour's unusually high levels of dietary fiber (a 100 gram serving of it contains a whopping 39 grams of fiber, almost double that of wheat bran). Dr. Bruce Fife, a naturopathic physician and the author of the book, Cooking with Coconut Flour, claims that coconut flour can help adults reach their recommended daily fiber intake of between 20-35 grams. He recommends adding 1-2 tablespoons of coconut flour to gravies, baked goods, casseroles or smoothies.

High in beneficial fats

Since it is derived from coconut solids, coconut flour retains a large number of those fats for which coconuts are so beloved by health enthusiasts. A 100 gram serving of coconut flour contains 8.7 grams of fat, of which 8 grams are saturated. Most of these fats are medium-chain triglycerides (MCTs) - essential protective fats with noted antiviral, antimicrobial and antifungal properties. MCTs have also been shown to boost the metabolism, making coconut flour suitable for weight loss diets.

Safe for diabetics

Because it is high in fiber yet relatively low in digestible carbohydrates compared to processed flours, coconut flour has a gentle impact upon blood sugar levels. This makes it an excellent flour for diabetics, prediabetics and anyone else who wants to avoid blood sugar spikes.

Packed with protein

Though it is free from gluten proteins, coconut flour contains an impressive number of other proteins. In fact, 100 grams of coconut flour contain 19.3 grams of protein, or 38 percent of our RDI - far more protein per serving than other leading flours such as white, cornmeal or rye. Consequently, coconut flour is a valuable cooking ingredient for vegan or vegetarian bodybuilders since protein is, of course, needed for cell repair and growth.

Learn more: http://www.naturalnews.com/043679_coconut_flour_gluten_free_vegan_protein.html#ixzz2rkOYIs3I

Thursday, January 16, 2014

We choose our birth pool!

I'm happy to say we choose our birth pool and got it in the mail. I set it up tonight, I'm super excited.
We went with the La Bassine original, here it what I ordered
http://www.store.waterbirthsolutions.com/La-Bassine-ORIGINAL-Personal-Tub-Liner-Deluxe-Kit-
LPD10.htm

Super great deal, came with everything I needed. Plus it is oh so comfortable! I highly recommend ordering through this company. They have really great 
Customer service! 

The pool is great! The bottom is really padded so its really comfortable to sit and kneel in. The sides are really sturdy. I just love this pool


Wednesday, January 15, 2014

4 Natural Remedies to Banish Dandruff & Dryness, Boost Scalp Health

By Danna Norek


The dry winter air in most climates can certainly do a number on your hair and skin, but it also can have a drying, irritating effect on another, less visible area – your scalp.  Scalp health is incredibly important when it comes to overall hair health and the ability of your hair follicles to produce plentiful and strong hair.
An itchy, dry and flaky scalp is all too common in a day and age where so many shampoos, conditioners and other hair care products contain harsh chemicals, drying surfactants and strong perfumes.  These can all further dry and damage the scalp.
Combine this with diets that are often lacking in the fatty acids, vitamins and minerals that contribute to a healthy scalp (after all, the scalp is just skin, it needs the same nutrients healthy skin requires), and scalp health issues are a common complaint.  Thankfully, there are several different natural oils and other naturally sourced remedies that can greatly help with the most commonly voiced scalp complaints.

Rosemary oil

Rosemary essential oil has several qualities that help with scalp irritations.  Their therapeutic effect on the scalp is mostly due to the highly antifungal and antibacterial nature of the herb’s oil.
Why would a remedy that is anti-fungal be important for dandruff and a healthy scalp?  Often times flaking and dandruff are at least partially caused by fungal growth on the scalp.  Is also has a mildly astringent quality, which helps to clean the scalp and prevent flaking without drying it.
Because it is an oil, it also has some moisturizing qualities in and of itself as well.  Rosemary oil is also anti-inflammatory, and can help soothe any irritations, bumps or scabbing on the scalp that is caused by excessive itching or dryness.
Rosemary oil is also thought to help stimulate hair growth when applied topically to the scalp.  Simply add a few drops to your shampoo for a pleasant, scalp-healing shampoo.  It is strongly scented, so sparing application is usually the best way to test this oil out at first.

Apple cider vinegar

Apple cider vinegar has long been a relied-on home remedy for scalp problems.  It primarily helps with dandruff as well as psoriasis of the scalp. It also may help to promote healthy hair growth since it is excellent at removing buildup without drying the scalp.
Apple cider vinegar (ACV) is an anti-inflammatory, anti-fungal and anti-bacterial agent.  Since dandruff and other scalp issues such as scabbing, dryness and flaking are due to excess yeast growth and inflammation, ACV helps by quelling yeast growth and soothing inflammation.  It should be used in roughly a 1:4 ratio in a water rinse.
Apple cider vinegar also has a nice topical acidity which helps to clean away the waxy type of dandruff or buildup that occurs.  It does this without drying out the hair since it is not a detergent, and is a great way to get this type of dandruff off the scalp for people who tend to have an oilier scalp (you don’t have to have a dry scalp to get dandruff).

Lemon oil

Lemon oil is excellent for clearing the waxy sebum on the scalp without drying or compromising the skin.  It has natural anti-fungal qualities as well, so it helps to address any type of fungal growth.  Lemon oil is also anti-bacterial, so it can help to clear up any type of bacterial infections on the scalp as well as calm inflammation.

Tea tree oil

Like lemon oil (it just doesn’t smell as good), tea tree oil is an excellent anti-fungal and anti-bacterial.  It doesn’t have the same yeast-neutralizing qualities that lemon oil or apple cider vinegar may have, but it does address many of the underlying issues that commonly affect scalp health effectively just the same.
Tea tree oil is strongly antiseptic and anti-bacterial, so it really helps to clear up any minor infections that may be causing discomfort and scabbing.  It also helps to relieve the itching that can go along with dandruff, psoriasis of the scalp and an overall dryness problem.
Often times when we’re experiencing scalp health issues, the scalp can begin to bleed and scab and these remedies all have anti-inflammatory properties to some degree, which helps to calm any existing inflammation.
Remember to hydrate your body well on the inside and out. Avoid harsh detergents on the scalp. This includes most of the dandruff shampoos you see in stores since they use harsh sudsing agents.
Try to wash your hair a few times a week since scabbing, itchiness and problems can start after a few days without washing if you have a particularly oily scalp.  If you’re using the right products to clean your hair and scalp, then you should really notice an improvement in your scalp health over time.
Danna Norek founded AuraSensory.com, which offers natural alternatives to traditional shampoos and conditioner for the hair, including a popular sulfate free, Shine Enhancing Shampoo that includes many of the ingredients talked about above, and a Deep Hydration Conditioner.
Sources for this article include:


Are We Dying to Look Good: Natural Hair Coloring Ideas


A man with a grey locks is considered distinguished and wise but when a woman goes grey she is accused of letting herself go.  In the 1950’s less than 10% of the woman dyed their hair. Today, the number is a staggering 75% or more.  This popular beauty habit can cost consumers $75-$200 every 6-8 weeks when having it done professionally. Your first grey hair will typically appear by the age of 34 and by age 50 up to 50% of all Caucasians will have a full head of grey hair.  Smoking, poor diet, stress and genetics can all contribute to premature greying.
Dying can be Deadly: Some chemicals used in hair dye products are known to be carcinogenic.
A 6-year study at Yale University has found that women who have spent years coloring their hair do indeed run a greater risk of developing non-Hodgkin’s lymphoma, a cancer of the lymph system that claims about half of all its victims.
Another study analyzing hairdressers showed a very marked increase in the incident of upper digestive tract, lung and skin cancer among this group that was continuously exposed to the chemicals in the hair dyes.
We don’t want to leave the guys out of this issue as the number of men dying their hair is on the rise. A study by Xavier University found that the gradual hair dyes like Grecian Formula contained so much lead acetate that the researchers couldn’t wash it off their hands! Lead is a cumulative chemical and even low-level exposure can ultimately result in cancer, brain damage, muscle weakness and depression.
Here’s a specific list of ingredients to watch for in your hair products: 4-MMPD, 4-chloro-m-phenylenediamine, 2,4-toluenediamine, 2-nitro-p-phenylenediamine and 4-amino-2-nitrophenol. Also, some coal tar colors used in permanent dark hair coloring contain heavy metal impurities, including lead and arsenic, both of which can cause cancer and disrupt hormones.
All Natural Alternatives
There are hair coloring products out there that are truly all natural, safe and non-toxic.  However, be very careful not to be fooled by clever labeling.  Just because Garnier adds in some avocado oil for a healthy shine, doesn’t change the fact that all the same toxic chemicals found in other products are right there on the label.
Fragrance(s)/perfume(s), Silica dimethyl silylate, Trideceth-2 carboxamide MEA, Glycerin, Propylene glycol, Citric acid, Thiolactic acid, 2-Aminophenol, Methylparaben, p-Phenylenediamine, Resorcinol, Cetrimonium chloride, p-Aminophenol, Pentasodium pentetate, Monoethanolamine (MEA), Lauric acid, 3-Aminophenol, 2-Methylresorcinol, Glycol distearate, Ammonium hydroxide, t-Butyl hydroquinone, Laureth-12, Chlorhexidine dihydrochloride, Hydrogen peroxide, Tetrasodium pyrophosphate (TSPP), and Avocado extract/oil. (This is only half the list of ingredients!)
Use real herbs and plant extracts
Good old mother nature provides some great alternatives for hair coloring enthusiasts. A great way to test how a natural made concoction will look is to save some snips of hair from your next haircut and make up a small batch of whatever dye recipe you want to try.  Apply the mixture to the hair sample and let it dry naturally (preferably in the sunlight) and see what the results are before applying all over and then having to live with it for six weeks.
Blonde Hair
List of Herbs: Chamomile, calendula, mullein, saffron, turmeric
Make a weekly rinse with any of these as a tea and it will brighten, highlight or add vibrant tones to those with blonde hair washed out hair.
  • Steep ¼ – ½ cup of any of these herbs in 2 cups of boiled water for 30 minutes
  • Strain out the flowers/herbs and let it cool
  • Shampoo your hair and towel dry your hair
  • Then rinse with this cooled tea while catching the rinse so it can be reused
  • Pour the rinse through your hair about 10 times
  • Squeeze out excess moisture and then leave in your hair for another 20 minutes or longer before completely rinsing it out with clean water
  • Allow hair to dry in direct sunlight if possible
Citrus fruits such as lemon can also act as lighteners and brighteners (but don’t forget to test results first).
Light Brown Hair
Rhubarb root is said to attract honey gold tones to light brown hair.
  • Pour three cups of hot water over four tablespoons of chopped rhubarb root
  • Simmer for 15-20 minutes
  • Strain it and pour it through your freshly shampooed hair 10 or more times
  • Rinse in clear water and dry in direct sunlight if possible
Brown/Black Hair
Some turn to henna products for covering up those grey hairs. Just don’t use it on color-treated hair as you may be unpleasantly surprised with the results. Like any semi-permanent dye, henna coats the hair and lasts about six weeks.  You can buy henna powder from herbal suppliers and health food stores. It’s known as a safe, healthful dye, and will make your hair feel thicker. A word of caution, henna tends to produce a brassy orange-red shade when used alone, so you may want to mix it with a “lighter” herb like chamomile.  Henna should not be used by people with white, gray or very light blond hair.
  • Put 2 Tbsp – 4 Tbsp henna into a nonmetal bowl (more for long hair)
  • Add enough boiling water to make a thick paste
  • Stir in a tablespoon of vinegar (which will help release the plants’ colors)
  • Let the blend cool for a few minutes
  • When the paste is lukewarm, put on a pair of rubber gloves (henna can stain your hands) and massage it into your clean, wet hair
  • Comb it through with a wide-toothed comb to insure even distribution of the dye
  • Pile up your hair, fit a plastic bag over it and wrap a old towel around your head to hold in the heat
  • You’ll need to leave the dye and towel in place from 30 minutes to 2 hours
  • When the time is up rinse your hair until the water comes clean, then allow to air-dry
  • Use lemon juice to remove any dye from hands or your hairline
Note: The darker your natural hair is the longer you’ll have to wait for the natural dye to take effect
Sage leaves can be used as a rinse to deepen any brunet and brown shades.  It is also said to effectively cover gray or dark hair. A sage rinse can be made by steeping a handful of the dried herb in a quart of boiling water for 30 minutes (longer, if you want it darker). Cool and strain it and rinse it through freshly shampooed hair 10 or more times. Then wait 10 minutes before washing the liquid out with clear water. A sage rinse is considered a progressive dye so you should apply it weekly until you get the shade you want and then repeat monthly.
Tag alder bark is another popular hair darkening remedy but it produces a lighter tone than sage, so it works to darken blond hair or to cover gray in hair colors that are light to medium brown. To make a tag alder rinse, simmer one ounce of bark chips in a quart of water for about 30 minutes, then cool and use it  as the rinse described above.
You will want to experiment with these different possibilities and come up with the one that is just right for you.  You will feel healthier knowing what you are putting on your hair and scalp and keep more of your hard earned money to top it off.